 NOTICE:
This article is bound to change drastically sometime in the future! This article is made, or was updated, for unreleased or unfinished media content. DO NOT rely on this page unless if you are a tester! (Hover or long-press for more information)

SynapseLib is a Java Minecraft modding library, but it does have standalone functions for the Java programming language.
It is currently developed under Oracle JDK 1.8 and is meant to be used with Minecraft Forge 1.12.2.
Functionality
SynapseLib is a lightweight library designed to reduce dependence on repeatedly writing repeatable code sections, especially in the Random Number Generation category. It also features blacklist/whitelist handling, mob stat handling, and more.
Users are highly encouraged to update SynapseLib as soon as they can; software built using SynapseLib that call for methods and classes not found in older versions WILL crash the game.
How to Install (v2.0)
This version is on Maven, hosted through Cloudsmith.
In order to import SynapseLib into your IDE via gradle, add this to your build.gradle's repositories:
maven {
    url 'https://dl.cloudsmith.io/public/vetpetmon-labs/synlib/maven/'
}
Then add this to dependencies, dependent on your Gradle version:
implementation fg.deobf('com.vetpetmon.synapselib:synlib:2.0') //Gradle 4.9
implementation 'com.vetpetmon.synapselib:synlib:2.0' //Gradle 8.5, recommended
If you are using the Loki MDK (not yet released), Synapse 3.0 implementation is included out of the box.
How to Install (v3.0)
Version 3 of SynLib is currently a WIP and isn't considered stable as of yet, and is not on Maven yet. It intends to be a replacement for GeckoLib, serving as an entity model and animation library. You can add it to your project by adding this line to the dependencies section of your buildscript:
compileOnly files('libs/synlib-3.0.jar')
(Note: The Loki MDK has the Synapse Library implemented out of the box.)
Getting Started (3.0)
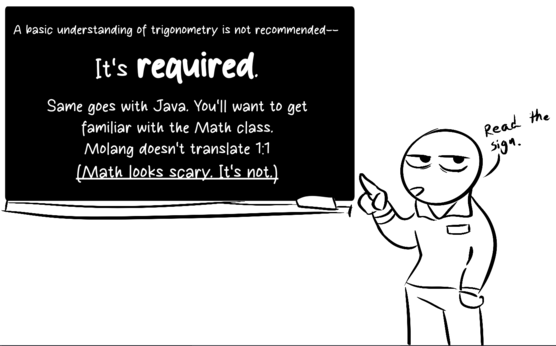
Synlib 3.0 is an animation library that uses the "Synaptic Animation" (SynAni) format. It allows for the layering of animations, quick creation of java models, combining pivot (json) and math (java) animation, texture layering, and the implementation of graphical effects. In order to accomplish this, Synlib features a wide assortment of mathematical, logical, and rendering functions. This will require you to know some basic trigonometry and some intermediate algebra. Need some resources? Study this handy source for basic trigonometry (Wikipedia has a wide selection of articles if a more in-depth explanation is needed), learn Molang here, graph Molang functions here, preview molang in real-time using Blockbench and the Geckolib plugin, and bookmark an online graphing calculator. You don't need to be a graphics programmer to use the Synaptic Animation system. Molang in Blockbench is a great resource, as it can be used to guide your SynAni code along with exporting your models to Java format.

Synlib version 3 still retains many functions from version 2, with entity AI functions, expanded random number generation functions, and block/item functions. If you were originally using version 2, a few refactors are needed to migrate to version 3. Anything in the util package has moved to the core.util, for example.
Making a Model
You can use your modeling software of choice; Blockbench and Tabula will work. If using Blockbench, make sure to set the project format to Modded Entity, and check that the project settings are in the 1.7-1.13 format, or you will receive errors upon exporting and importing it into your java repository. Once you have imported your model into the repository, you'll want to extend the AnimatedEntityModel class, instead of ModelBase. This will give you access to all of the functions you will need for your animations and model rendering.
Making a Renderer
Once your model class is ready for rendering, you'll want your renderer to extend AnimatedEntity instead of RenderLiving. The start of your file should look like the following:
public class MyMobRenderer extends AnimatedEntity<EntityMyMob> {public MyMobRenderer(RenderManager renderManager){super(renderManager, new MyMobModel(), 1F);}}
This is the start of your renderer class! However, there are some methods you will want to override, before you should start testing in-game:
| Method Name | Description | Returns | Code Example | Default Return | Used By |
|---|---|---|---|---|---|
| getName | The entity's name (Should not be left blank), which will be used to assign a folder to itself. For example, Wyrms of Nyrus's prober textures are located within textures/entity/prober/
|
The name of the creature | @Override
public String getName(){return "prober";} |
creature | getEntityTexture,getEntityGlowTexture |
| getVariant | The entity's name (should not be left blank). Wyrms of Nyrus standard likes to use values such as "norm" for the base texture, so a file should be located in textures/entity/prober/norm.png, for example.
|
The variant of the creature | @Override
public String getVariant(){return "norm";} |
variant | getEntityTexture,getEntityGlowTexture |
| getDomain | Your mod's domain, which is where your asset files have to be located within. | The ResourceLocation's domain | @Override
public String getDomain(){return MyMod.ID;} |
synlib | getEntityTexture,getEntityGlowTexture |
Adding a Glow Layer
In the constructor of your renderer class, adding this line will generate a glowing layer for your model automatically: this.addLayer(new LayerGlowing<>(this))
The glow layer is an image with the filename of the original texture, with _glow added before the PNG file extension. Make sure the image dimensions match, or unexpected results may occur.